Tile flooring is beautiful and long-lasting, but grout, on the other hand, causes us to scrub and scratch our heads.
Grout is a dense, viscous substance used to fill gaps between the tiles and reinforce existing structures. Though it keeps the tiles in place, grout is porous in nature. Grout tends to absorb moisture, dirt, and debris, which can be challenging to clean. In many cases when tiles appear clean, unfortunately, the grout lines do not.
If you are struggling with dirty grout lines, never fear! We have some great information and tips to help you out.
Different Grout Types
There are a number of kinds of grout, most of which come in a variety of colors. Before you decide on the type of grout, begin collecting cleaning equipment and creating a cleaning plan, you must consider both type and color.
1. Epoxy Grout
Epoxy grout is more resistant to water spills and less prone to sagging and shrinking than cement grouts. According to the Tile Council of North America (TCNA), epoxy grout is as stain-proof as tile. It absorbs up to 50 times less moisture than cement grout and is more durable.
Epoxy grout is effective in harsh environments such as shower floors and walls, and kitchen backsplashes. If you want white, or light-colored flooring, epoxy grout is your best choice. Although the chances of epoxy grout needing deep cleaning are slim to none, it is more costly than traditional cement grouts and takes a little longer to apply.
2. Sanded Grout
Sanded grout is made of cement with grit, and you’ll also feel and see it when working on it. Tilers use sanded grout in the joints, which are 3.1 mm to 15.8 mm wide, depending on the product. It is an excellent choice for high-traffic floors, but it’s not ideal for smooth, polished stone. When applying the grout, the grit may scratch the tile surfaces.
3. Unsanded Grout
Unsanded grout is also a type of cement grout which does not contain grit. Tilers use it for narrower joints, like 1.58 mm. This long-lasting material is easier to apply and cleans up faster than sanded grout. Also, it can be used on both smooth tiles and longitudinal areas, such as shower floor tiles.
How to Clean Dirty Grout on Floor Tiles

When cleaning grout, always choose the mildest methods, like hot water and grout cleaners. If that approach doesn't work, you can progress to the smellier, more strenuous, and time-consuming options below.
If you are unsure whether a grout cleaner is appropriate for your surface, it is always best to try a test patch. Try it in a hidden location, such as under an appliance in the kitchen or behind the toilet in your bathroom.
Always check the manufacturer’s maintenance guidelines as your specific tile might have other recommendations to ensure your warranty isn’t voided. Feel free to call us (Altimate Flooring in Rapid City, SD) if you need a copy of your manufacturer’s maintenance guidelines.
Tools for Cleaning Grout
Tools for cleaning grout include:
- Grout scraper
- Grout sealer
- Cleaning bucket for grout
- Baking soda
- Vinegar
- Stiff-bristled brushes
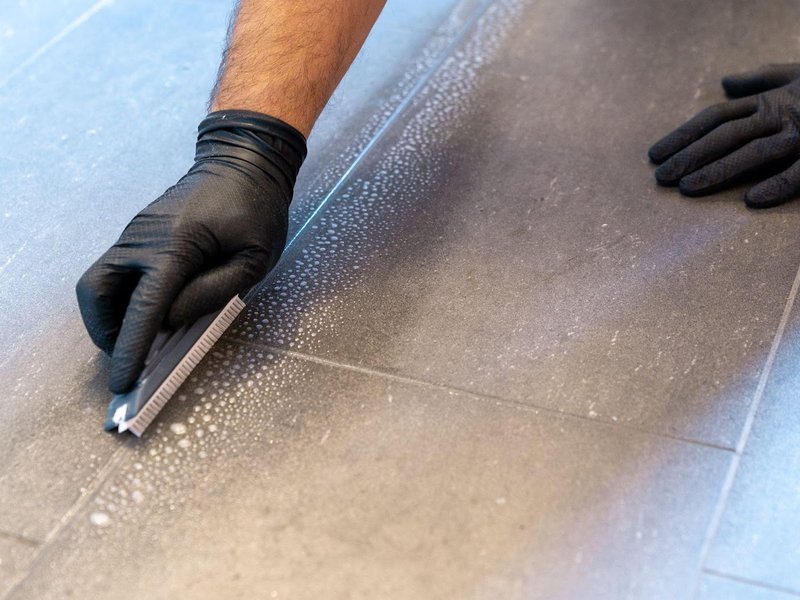
1. Scrub dirty grout with a medium-bristle brush and warm water
If you cannot get a grout scrubber, available at most home centers and hardware stores. You can use a medium-bristle brush rather than a stiff steel brush to prevent damaging grout damage (using a soft brush requires more effort). Sprinkle warm water on the grout and scrub it before letting it dry. Also, remember to use only a tiny amount of water, and don't leave it on the grout for a long time since grout is porous and can accumulate moisture, leading to mildew.
2. Using Dish Soap
The solution to how to clean grout on tile floors is also surprisingly simple. It may be enough to clean with water alone. However, if that doesn’t do the trick, prepare a quick mixture of dish soap with water and apply it with a microfiber cloth or a microfiber mop. After this, wipe away any residue with hot water.

3. Commercial Grout Cleaners
Using commercial grout cleaners can help you remove mold and mildew quickly and restore your white grout lines. Spray-on cleaners are effective without scrubbing, so they save time and energy. However, they might contain harsher solvents, acids, or chlorine bleach.
Before using any of these products, carefully read the ingredients and follow the instructions, especially the safety precautions. And to be on the safe side, start with a test patch as described above.
How to Avoid Damaging Your Tiles When Cleaning Grout
Here are a few pointers you need to avoid when cleaning grout to avoid damaging it:
Excessive Water Use
When cleaning your grout, don't use too much water.
Water is required to clean the tile floors, but don't use too much when cleaning grout. Because grout is porous, water will be absorbed and break down the grout. By using excessive water when cleaning, you not only reduce the structural strength of the grout but also encourage the growth of bacteria, mold, and mildew. Instead of excessive water, focus on scouring the grout with an appropriate cleaner.

Using Dangerous Chemicals
Harsh chemicals can damage grout. They will degrade the grout, reducing its lifespan, meaning you will be required to have the floor regrouted, an expensive and time-consuming activity. Even if the loss is minor, it will undoubtedly be enough to allow more debris and water into your grout, resulting in more stubborn stains and odors.
Use gentle cleaners on a routine basis to dislodge dirt before it causes a stain. If you mop your floors or wipe down your counters regularly, you should be able to keep them clean. Of course, spills should always be cleaned up immediately so that they do not stain.
Scrubbing with Coarse Scrubbers
When cleaning grout, avoid using coarse scrubbers. Grout is a more delicate material than it appears. It fills the gaps between the tiles and with proper care, it has a long life expectancy, but it is also easily damaged. Using a coarse scrubber, such as steel wool, can remove the grit from the grout, leaving holes and making it more susceptible to future damage.
Therefore, it's best to use either a soft cloth or, if necessary, a medium or soft-bristle scrubber, like the one that comes with a kitchen sponge.
How to Seal Grout on Tile Floor
- Before sealing, ensure the grout is completely dry and sufficiently cured
- Wait a minimum of 48 to 72 hours after applying the grout
- Tape off any nearby wood cabinets or baseboards to avoid unintentional deposits or stains
- The next step is to apply a sealant to grout lines. You can use a paintbrush or a roller
- Begin from one corner and then proceed to the other part
- Wait for 5 to 15 minutes to let the first coat completely absorb into the grout (You can also wait a little longer as some sealant requires more time. It is important to read the manufacturer’s instructions carefully)
- Apply the second layer of sealer
- Wipe the tiles clean with a dry and clean cotton cloth. It is critical to remove excess sealant from your tile. If the grout sealant becomes dry on your tiles, use cheesecloth pads and water to scrub away any residue
- Allow the sealant to cure for a day or two.
- Finally, check if the sealant has adequately cured. Spray a few drops of water on the grout lines. If water pools on top of the grout, it has been properly sealed.
Final Word
Cleaning grout can be a little challenging if you allow it to accumulate dirt and stains over an extended period. Therefore, it is better to clean grout lines regularly. You can choose any of the above-mentioned cleaning methods to remove stubborn grout stains. Ensure you are not leaving the chemicals or excessive water on the grout for too long, as this will damage it.
Please contact Altimate Flooring if you have any questions or browse our tile selection if you’re looking to update your flooring. We service Rapid City, SD and surrounding areas.

